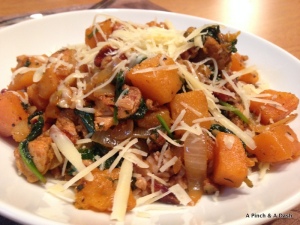
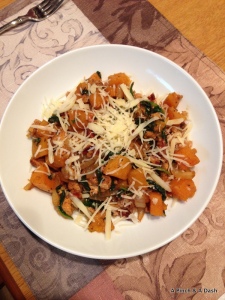
Recipe: Farro with Butternut Squash, Onion, Chicken, and Spinach

It seems like a busy work schedule, frustratingly tiny kitchen, and, to be honest, sheer laziness, has kept me from posting for the past six months or so. In that time, I’ve been all over the map with my dinners…sometimes I make something so simple, it doesn’t seem worth it to post about it. Other times, I loosely follow recipes printed from Pinterest and elsewhere across the web, but, by the time I finish eating and cleaning up, I’m in no mood to type about the process. Still other times, I come up with something totally off the top of my head, but, yet again, I don’t get around to posting about it and forget about it after a week or two. In this case, this meal was the last of those three—something I came up with just looking at what I had in the fridge—and it was just too good not to share, so I really wanted to make sure I posted about it.

I bought cubed butternut squash on a whim last weekend—it was bright orange (and thus very visible in the produce section) and it was on sale, so I grabbed it, with not a clue what to make with it. I gave it some thought after I returned home…I knew I didn’t want to use it in pasta, but something nutty, like farro, seemed like something that would pair well with it. Chicken was easy enough to throw in, plus a little onion and garlic for flavor, and a little paprika and cinnamon for heat and sweet. Add in a few heaping handfuls of spinach and some freshly grated Gruyere and I had a wonderful, hearty, winter dinner.

Farro with Winter Vegetable Medley

Serves: 2

Prep. time: 10-15 minutes

Cooking time: Approx. 30-40 minutes

Difficulty: Easy

Ingredients

  • Approx. 1/2 cup farro, cooked according to package instructions
  • 1 chicken breast, cubed and seasoned
  • Approx. 2 cups butternut squash, cubed
  • 1/2 yellow or white onion, chopped
  • 2-4 cloves garlic, minced
  • 3-5 handfuls of baby spinach
  • Shredded/grated Gruyere cheese
  • Seasoning: garlic powder, onion powder, cinnamon (just a pinch, to bring out the sweetness of the squash), pepper, salt, paprika
  • Butter
  • Olive oil
  • Chicken stock and/or sweet cooking wine (sherry or marsala), for deglazing

Directions

Cook farro according to package instructions (the brand I used cooked for approx. 30 minutes, so I was able to cook everything else up while it was cooking). Heat a little butter and olive oil in a large, deep pan over medium-high heat, add the chicken and cook until just done, then set aside and cover. Add a little more butter to the skillet, and a splash of chicken stock and/or wine to deglaze the pan, then add the onion. Cook for 2-3 minutes, then add the butternut squash and spinach, cover, and cook for 8-10 minutes, lifting lid occasionally to stir and add seasoning. As the farro is in its last minutes of cooking, add the minced garlic to the vegetable medley and toss the chicken back in to reheat. The onion and butternut squash should be tender when done. Serve the mixture on top of the farro and top with Gruyere cheese.

Farro with Winter Vegetable Medley

Cook’s Comments

This dish is the perfect dish for the cold autumn and winter months: it’s hearty, warm, peppery, cheesy, and nutty. The butternut squash is the real star—it’s tender, like cooked zucchini, and has a buttery savory-sweet flavor that adds a twist to this dish. Adding a pinch of cinnamon adds warmth and depth of flavor to the dish, while pepper, paprika, and garlic add a little heat. Farro has this wonderful honeyed, nutty flavor with a unique chewy texture, somewhere in between rice and pasta, and it makes the perfect base.
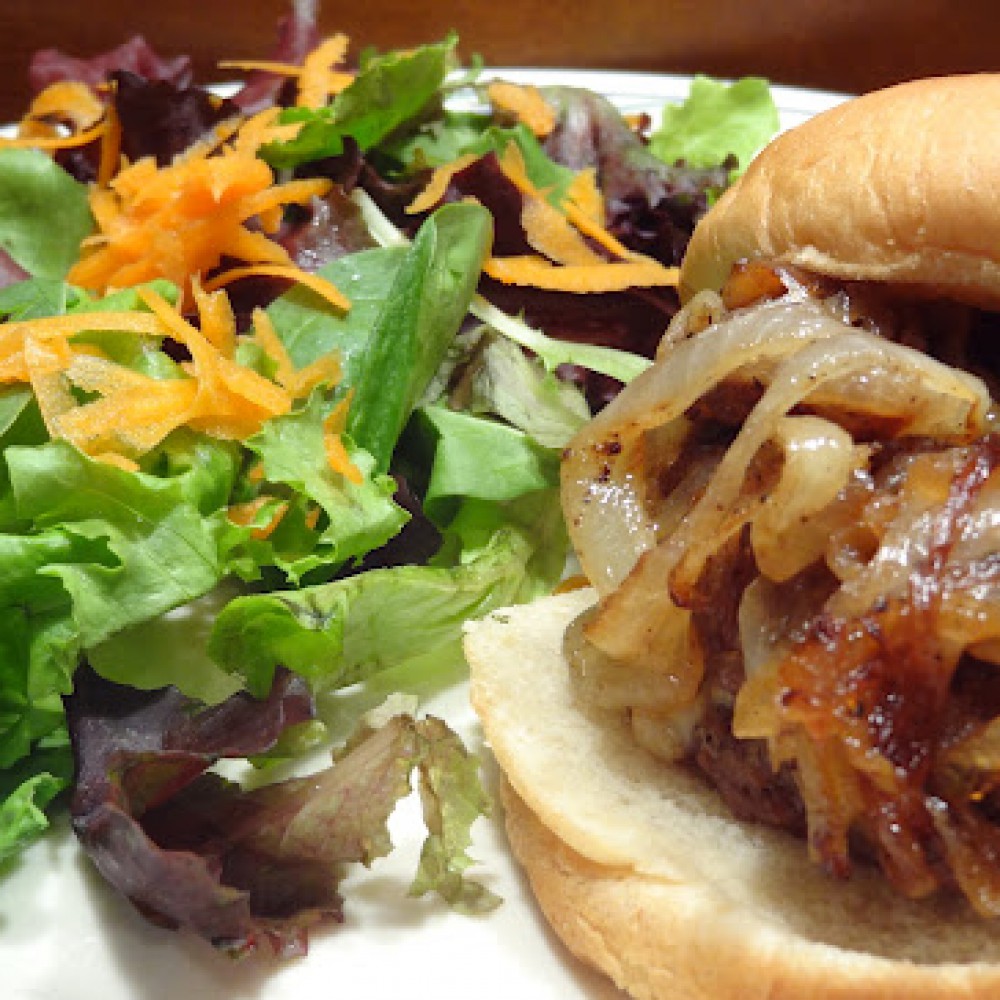
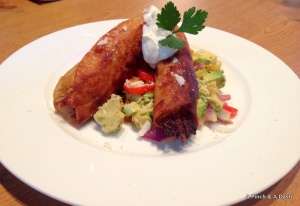
Recipe: Chicken Flautas with Avocado Side Salad

A few weeks ago, I bought the smallest pack of corn tortillas I could find to make some sort of shrimp tostada dish or something like that (whatever it was, it obviously wasn’t very successful, because I didn’t post it here). Well, “smallest pack” meant “use four for dinner and have upwards of twenty left over,” so I’ve been trying to get creative and use them up. I tried making baked tortilla chips (my boyfriend and I are trying to be smart about what we eat) without much success, then I made some sort of kinda awful tacos (you really can’t eat those tortillas right out of the pack; they are not at all like soft taco shells), but finally, I came across this recipe for flautas while browsing Pinterest food boards and it looked like a winner. I did my usual “look at the recipe, then ignore 85% of it and do it my own way” thing that I like to do and made my own version of these tasty little crispy rolls. Obviously, frying them up in oil makes them not quite as healthy as they could be, but I tried to keep the oil levels to a minimum and balanced the dish out with a fresh side salad of avocado, baby bell peppers, and red onion.
Chicken Flautas with Avocado Side Salad

Serves: 2 (makes 2-3 flautas per person)

Prep. time: 15 minutes

Cooking time: 15 minutes

Difficulty: Easy


Ingredients

  • 1 large chicken breast
  • Chicken stock
  • Cumin
  • Coriander
  • Paprika
  • Ground ancho chile or other ground, dried pepper
  • Salt & Pepper
  • Garlic powder
  • Onion powder
  • 1 lime, juiced and zested
  • Sour cream
  • Mayonnaise
  • Cojita cheese, crumbled or shredded
  • 4-6 corn tortillas
  • Vegetable or canola oil
  • 1 avocado, flesh cut into chunks
  • Approx. 6 baby bell peppers, sliced*
  • Approx. 1/2 red onion, thinly sliced

*Cut from end to end to get circular slices


Directions

Bring a small-to-medium pot of chicken stock to a boil, then add the chicken (liquid should just cover the chicken breast) and cook for 15-20 minutes, or until tender and cooked all the way through. Remove the chicken breast (the leftover broth can be used as stock for another meal or it can be tossed) and set in a bowl. Using a fork, shred the chicken breast by running the fork through the flesh and pulling it apart; shred the chicken into the bowl. In a small bowl, blend together a few tablespoons each of sour cream and mayo, then add approx. 1-2 tsp. each of all of the dry seasonings in the ingredient list, along with a splash of lime juice and some lime zest, then whisk to blend. Toss the mixture with the chicken until fully coated (chicken should not be soaked in this creamy blend but, rather, lightly coated); add more dry seasoning as desired. Add a heaping handful of cojita cheese and toss to combine. Cover and set aside in the fridge.

In a large, deep skillet, heat vegetable oil—about 1.5 to 2 inches deep—over medium high heat. While it’s heating up, lay 4-6 corn tortillas out on a flat surface. Remove the chicken mixture from the the fridge and spoon some of the mixture onto each of the tortillas. Roll each tortilla tightly and pierce each one with a toothpick to keep them shut and form your flautas. When the oil is hot (about 375*F; if you throw a little piece of tortilla in the oil, it should immediately start bubbling), start adding in the flautas. Let them cook for about a minute, then turn, making sure to turn so that each side has a chance to fry; do not overcook them or let them sit in one spot for too long—they brown easily. As they finish, remove them from the pan and set on a paper towel-lined paper plate to drain excess oil.

In the meantime, heat a little oil in a small pan. Add the red onion and peppers, season with a little salt and pepper (and other seasonings, as desired), and cook until crisp-tender. Remove from pan and toss with the avocado, a little more salt and pepper, and fresh lime juice. Serve the flautas on top of the salad, with a dollop of sour cream added, if desired.


Cook’s Commentary

This is the best of both worlds: healthy, fresh food and crunchy, fried food combined to make the perfect dinner. The “salad” is fresh and flavorful, with the creamy texture of the avocado blending deliciously with the sweet and spicy flavors of the red onion and peppers. The chicken flautas are crispy on the outside and the chicken mixture within is tender, a little spicy, a little tangy, and oh-so-tasty. I had a little of the “sauce” mixture that I tossed the chicken with left over, so I served that as a dipping sauce, but a spoonful of sour cream or, if you want to splurge, a drizzle of queso, would work as well.

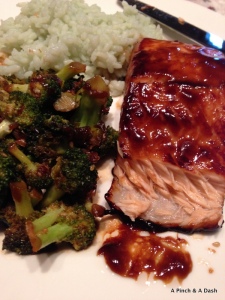
Recipe: Teriyaki Glazed Salmon with Broccoli and “Yum Yum” Sauce

I always hear about how fish is really good for you and everyone should eat at least one serving of fish a week. I grew up with a British grandma who loved fish-and-chips, a Catholic father who occasionally subscribed to the “Fish on Friday” practice, and cousins who lived just a car ride away from the Maryland shore, but fish was never a big part of my diet. My mother used to make tuna noodle casserole (tuna salad to our family) in the summertime and we’d occasionally dine out at Red Lobster (fine dining as a young child), but fish was always, well, “fishy” to me; I mostly stuck to fried shrimp and the occasional crab cake, but that was about it. After college, while I was living back home in Pennsylvania, I took some culinary arts classes at the local community college and in one of the classes, we focused on different food groups each week. During one of my class periods, we focused on fish and seafood; when we sat down to eat, we had fried catfish, salmon topped with mango salsa, oven baked red snapper, shrimp scampi, and more—it was the perfect opportunity to try food I wouldn’t ordinarily be open to and it was the push I needed to delve into cooking and eating fish.

Last week, smack dab in the middle of our new and ongoing “eating healthy” lifestyle, I decided my boyfriend and I could use a little salmon–some heart healthy Omega-3 fatty acids sounded like the perfect addition to our diet. Salmon is a hit-or-miss fish for me—certain types, like sockeye, are too “fishy” tasting while others seem to be made more for lox, sushi, and other cold dishes. I picked cheap yet tasty-looking salmon filets from my favorite local grocery store, hoping for a subtle flavor, and they were perfect. My boyfriend and I have been on an Asian flavor kick lately, and a quick visit to Pinterest gave me the result “teriyaki salmon” over and over again, so that’s what I aimed for.

Teriyaki Glazed Salmon with Broccoli

Serves: 2

Prep. time: 20 minutes

Cooking time: 15-20 minutes

Difficulty: Easy


Ingredients

  • Approx. 1/2 cup soy sauce
  • Approx. 1/4 cup brown sugar
  • Approx. 1-2 tbsp. honey
  • Garlic powder
  • Approx. 1-2 tbsp. mirin or sherry
  • 2 salmon filets, skin on
  • 1 head broccoli, cut into florets
  • 1 bunch green onion, finely chopped
  • Vegetable or peanut oil

For Japanese “Yum Yum” dipping sauce:

  • Light mayonnaise
  • Water
  • Approx. 1/2 tsp. garlic powder
  • Approx. 1/4 tsp. paprika
  • Approx. 1 tsp. sugar
  • Approx. 1 tsp. tomato paste (or ketchup)
  • Approx. 1 tbsp. melted butter


Directions

In a small bowl, whisk together the soy sauce, brown sugar, honey, mirin, and a pinch of garlic powder. Pour into a bag, add salmon to the bag, seal, and place in the fridge to marinate for 20-30 minutes.

Heat a little oil in a medium pan over medium high heat, then add the broccoli and green onion and cook until the broccoli is just starting to brown and crisp slightly. Reduce the heat, add a splash of soy sauce, a pinch of garlic powder, and a little chicken stock and keep the vegetables warm.

Heat a nonstick pan over medium high heat, then remove the salmon filets from the bag of marinade and place skin side up in the pan; reserve the marinade. When the salmon is browned, flip it over to cook the skin side. In the meantime, pour the marinade into a small pot and bring to a gentle boil. Once bubbling, whisk a little water-and-cornstarch mixture into the liquid and let it thicken to a shiny, semi-thick glaze. Brush some of the glaze on the salmon. The salmon, when done, should feel fairly firm when you press a finger down into it and should be lightly pink in the middle and pull easily away from the skin. Serve the salmon with the broccoli and add a drizzle of teriyaki glaze over the broccoli. If you’d like to add a creamy element to the dish, whisk together the ingredients for “Yum Yum” sauce: Add the dry ingredients to a small bowl, then add melted butter, tomato paste, and a little mayo and whisk together. Add a splash of cold water to thin the sauce, then taste—add more mayo to make more sauce and adjust seasoning as desired. Drizzle on the salmon and broccoli or serve as a dip.


Cook’s Commentary

Teriyaki sauce is so simple and so perfect—it’s sweet, it’s salty, and it’s somehow meaty too. When cooked down into a gooey glaze, it adds this lip-smacking quality to the salmon, already flavored with the thinned out marinade version of the sauce, and that deep brown color is just stunning. Broccoli is a great, simple side for this dish, and the green onion adds a little pop of flavor to it. I added a bamboo flavored rice to add a little more volume to the dish, but a side of quinoa or brown rice would work just as well, or keep it light and stick to veggies only. This salmon had a light, fresh flavor that shined through the umami goodness of the teriyaki and made for a healthy, filling meal.

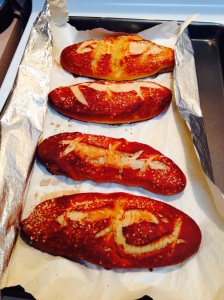
Recipe: Soft Pretzel Buns, Brats, and Blue Cheese Slaw

A month or so ago, my boyfriend and I met up with one of his friends from law school and went to the downtown Memphis Farmers Market. On that beautiful sunny day, we played with shelter dogs out for a visit, noshed on food truck food, and filled up a bag each of goodies, including Nutella “Pop-Tarts,” fresh baked ciabatta, and jam. One of my finds that we were quite enthusiastic about was a package of beer-and-cheddar bratwurst from West Wind Farms. While I was dreaming up tasty sides for them (cole slaw, potato salad), John was dreaming up the perfect beer to pair with them, but there was one thing we both thought up that we knew we had to have with them: pretzel buns. Our favorite restaurant in Memphis, Hog & Hominy, has a house-made cheddar beef hotdog served in a homemade pretzel bun that we absolutely adore and I wanted to recreate that taste. After a little research online, I came across a recipe from Jeff Mauro, Food Network’s “Sandwich King,” and I figured, if he’s the king of sandwiches, he oughta know how to make a damn good pretzel bun. Well, these buns weren’t just good, they were phenomenal, and even after we’d had our meal of brats and buns, we’d toast up the leftover buns and eat them as a snack. A touch of honey adds sweetness to the bread, while garlic and little butter adds a salty element, and, when prepared properly, they’ve got that perfect shellacked outside and fluffy-chewy inside.

Pretzel buns

Yields: Approx. 8 buns

Prep. time: 20-30 minutes

Inactive time: Approx. 1 hour

Cook time: 15 minutes


Ingredients 

  • 2 tbsp. honey
  • 1/4 cup brown sugar
  • 1/2 cup water
  • 1 cup skim milk
  • 1 packet active dry yeast
  • 2 tbsp. unsalted butter
  • 2 small cloves of garlic, minced
  • 3 cups all-purpose flour, plus more for dusting
  • 1 cup bread flour
  • Approx. 1/2 cup baking soda
  • Coarse salt for dusting pretzels

Directions

In a small pot, heat honey, brown sugar, water, and milk to 105*F to 110*F, then pour into the bowl of a stand mixer. Sprinkle packet of yeast over the liquid mixture and let sit for 10-15 minutes, until the yeast blooms.

In a separate pot, heat butter and garlic together over medium-low heat until butter is melted and garlic is fragrant.

Mix together the flours and add them to the bowl of the mixer with the yeasty mixture, then pour the butter and garlic mixture into the bowl and mix on medium speed until the mixture becomes smooth and elastic in texture and pulls away from the walls of the bowl, approx. 6-8 minutes.

Line a baking sheet with a silicone mat, like Silpat, or parchment paper (or other nonstick product). Turn the dough out onto a lightly floured surface and form into a ball. Cut into 8 equal pieces, then roll each piece into a ball and place onto the prepared baking sheet. Cover with a dish cloth and let them rest in a warm place for 12 to 15 minutes (I left mine out on the counter in the kitchen).

After allowing the dough balls to rest and rise a bit, dust your work surface again and roll the 8 balls into logs about 6-7 inches long. Place back on the lined baking sheet, cover with the dish towel, and let rest in a warm spot for an additional 30 minutes.

Preheat the oven to 425*F and place one oven rack high and the other one low. Line a second backing sheet with Silpat or parchment paper. In a large pot, bring approx. 8 cups of water to a boil, then add the baking soda. In batches of one pretzel at a time, drop a dough log in the water and cook on both sides each for 30 seconds. Remove with a slotted spatula, lightly dust the outside with coarse salt, place on one of the two baking sheets, and repeat until all of the logs have been dipped and salted. Cut three shallow diagonal slits in the top of each roll.  Bake for 10-13 minutes, rotating the pans between the top and bottom of the oven, until they are shiny brown and fully baked.


Brats & Slaw Serving Suggestion

Fully cooked brats can be cooked in a nonstick pan until crispy and browned on the outside and warmed through. To create the blue cheese slaw, blend a few tablespoons each of mayonnaise, sour cream, and blue cheese (or gorgonzola; use a creamier variety for easier blending) with a little salt and pepper. Toss with a prepackaged cole slaw blend (cabbage and carrots) until evenly coated. Serve the brats on pretzel buns topped with the slaw.

The bun, complete with beer-and-cheddar bratwurst and blue cheese cole slaw

The bun, complete with beer-and-cheddar bratwurst and blue cheese cole slaw

Cook’s Commentary

While this most certainly didn’t qualify for the “healthy” category we’ve been aiming for with our dinners lately, this meal was well worth it. The pretzels had that perfect chewy texture that you expect in a soft pretzel, with a little crunch from the coarse salt. The honey and garlic created a sweet-and-savory flavor that make these pretzels perfect with hotdogs, brats, or burgers (if you changed the bun shape), but would pair perfectly with a sweetened cream cheese spread or a dipping of cinnamon sugar. These pretzels are dynamite right out of the oven, but reheat quite well in a toaster oven (don’t cut them open, that way, you get a warm and crispy outside, while the inside still stays fluffy, chewy, and warm).

Recipe: Strawberry-Rhubarb Pie

When I was a little girl, my Grandma Nan and Opa (grandpa) lived in a small home in southern Pennsylvania, with a swimming pool and vegetable garden out back and an old weeping willow out front. My cousins and I would spend days there in the summertime, playing “mermaids” in the pool and helping my Opa pick raspberries and dig up potatoes. During these warm months, my grandma would always make homemade strawberry-rhubarb pie—buttery crust dusted with sugar, filled with sweet-and-tangy fruit filling. At the moment, I have no idea where her recipe has disappeared to, but the other day, as I was huddled in my apartment, dealing with a late winter sleet storm here in Memphis, I thought about that pie, and warm weather, and sunshine and I’ve been craving that pie ever since. I found this recipe on Food Network’s website and the title “Grandma’s Strawberry-Rhubarb Pie” pulled me in. This recipe combines sour rhubarb, sweet ripe strawberries, tangy lemon juice, spicy cinnamon, and lots of sugar to create a rich fruit filling.


Makes: 1, 10 inch pie

Prep. time: 20-30 minutes

Baking time: 1 hour

Difficulty: Easy


Ingredients

For the crust

  • 2 cups all-purpose flour, plus additional flour for dusting and rolling the dough (approx. 1/4 cup)
  • 1/2 cup cake flour*
  • 3 tsp. powdered sugar, sifted
  • 1/2 cup (butter-flavored) shortening, like Crisco
  • 1/4 cup salted butter
  • Pinch salt
  • 1 egg
  • 2 tsp. vinegar
  • 1/4 cup ice cold water

*You can make cake flour with regular flour if you don’t have cake flour on hand. For every 1 cup of all-purpose flour, removed 2 tbsp. flour and replace with 2 tbsp. cornstarch. Sift well to blend.

For the filling

  • 2&1/2 cups fresh red rhubarb, chopped
  • 2&1/2 cups ripe strawberries, de-stemmed, washed, and cut into halves or quarters
  • 1&1/2 cups granulated sugar
  • 2 tbsp. minute tapioca
  • 1 tbsp. all-purpose flour
  • 1/2 tsp. lemon zest
  • 1/2 tsp. lemon juice
  • 1/2 tsp. ground cinnamon
  • 1 tsp. vanilla extract
  • 3 tbsp. unsalted butter, cut into small cubes
  • 1 egg white beaten with 1 tsp. water, for egg wash
  • Large granule sugar, for dusting the crust
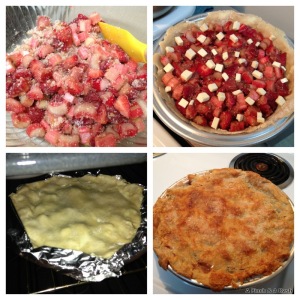
The fruit filling mixture; the filling in the pie crust, topped with butter; the pie in the oven; the pie right out of the oven

The fruit filling mixture; the filling in the pie crust, topped with butter; the pie in the oven; the pie right out of the oven

Directions

For the crust

Cut the butter and shortening into the flours, sugar, and salt with a pastry blender. Whisk the egg, vinegar, and cold water in a bowl or measuring cup and pour over the dry ingredients, then gently blend by hand to combine—do not overwork the dough or it will become tough. Shape the dough into two equal-sized balls, wrap separately in saran wrap or wax paper, and chill in the fridge for a few minutes. Remove one dough ball from the fridge, roll it out to fit the pie pan, then place it into the pie dish and return to the fridge to chill.

For the filling

Preheat the oven to 425* F. Add the strawberries, rhubarb, sugar, tapioca, flour, lemon zest and juice, cinnamon, and vanilla to a large bowl. Mix well and and pour out into chilled pie crust in the pie pan, then dot the top of the filling evenly with the butter cubes. Brush the edges of pie crust with egg wash. Roll out the other piece of dough and place over filling, then crimp to seal the edges. Brush the whole top of the pie with egg wash and sprinkle with large granule sugar. Wrap the edges of the pie crust with foil to prevent burning and bake at 425* F for 15 minutes. Decrease temperature to 375* F and bake for an additional 40 to 50 minutes, or until the filling starts bubbling and the pie crust is golden brown. Remove from oven when done and cool before serving. Great with vanilla ice cream!

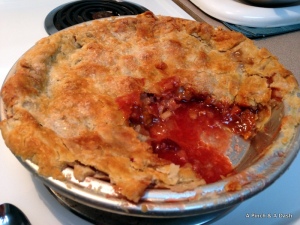
My boyfriend and I were too eager to wait for the pie to cool properly, so we made a bit of a mess. :)

My boyfriend and I were too eager to wait for the pie to cool properly, so we made a bit of a mess. 🙂

Cook’s Commentary

This variation of strawberry-rhubarb pie has a unique blend of flavors that makes it a big winner in my books. Strawberries add their sweetness, while rhubarb adds a tangy-sour flavor, but then you get this pop of brightness from the lemon juice and zest and warmth from the cinnamon and vanilla. Flaky buttery crust is perfect with this sweet, gooey filling. Be sure to be patient and let it cool completely before cutting into it, otherwise you’ll get the fruity mess that you see in the picture above (totally tasty and worth it though!). It’s not my Grandma Nan’s recipe, but it’s pretty damn good and I’ll definitely be making it again once summer arrives.

Recipe: Cajun Pasta with Andouille Sausage and Peppers

Serves: 4

Prep. time: 15 minutes

Cooking time: 15-20 minutes

Difficulty: Easy

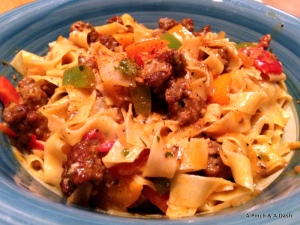
Cajun Pasta with Andouille Sausage and Peppers

Ingredients

  • Butter
  • Olive oil
  • 2-3 andouille sausage links, casings removed; pulled apart into small/bite-size pieces
  • 1 yellow or white onion, chopped
  • Red, green, and orange bell pepper (half of each), diced
  • 1-3 garlic cloves, minced
  • 1-2 dried chili peppers, minced, or a dash of crushed red pepper flakes
  • Approx. 1-2 cups chicken stock
  • Approx. 1/2 cup white wine
  • Approx. 1/2 to 3/4 cups heavy cream
  • Cajun seasoning blend
  • Salt & Pepper
  • Paprika
  • Dried parsley
  • Cornstarch-and-water mixture, as needed
  • Long, semi-wide pasta, like fettuccine or linguine

Directions

Bring water to a boil for the pasta. In the meantime, heat some butter and olive oil in a large pan over medium high heat, add the andouille and cook until browned on the outside and no longer pink on the inside, then remove from the pan and set aside on a plate. Add the diced vegetables and chili pepper/pepper flakes to the pan with a little more butter and olive oil, and cook until crisp-tender, then add in the garlic and cook for another minute. Remove the veggie mixture from the pan, bump the heat up a little bit, then add the chicken stock, wine, and a generous heaping of Cajun seasoning and paprika. Let the mixture gently boil, then slowly whisk in the heavy cream. Season as needed with Cajun seasoning, paprika, parsley, salt, and/or pepper, and thicken with cornstarch-and-water if necessary; don’t be afraid to add more liquid to the sauce if it starts cooking down—you don’t want to end up with soup, but you want enough to generously coat the pasta. While the sauce is cooking, cook the pasta (or start it earlier if you chose a style that will take longer than 3-5 minutes). When the pasta is cooked, drain it and return it to the pot. Add the veggies and sausage back into the thickened sauce, then add the finished pasta in with the sauce and toss to combine. Serve hot, with a sprinkling of Parmesan on top, if desired.

Cook’s Commentary

This dish is hearty and packed with flavor—spicy, creamy, salty, and meaty—it’s perfect on a cold day but bright and flavorful enough for warm weather too. Andouille sausage has a distinct flavor like no other sausage and Cajun seasoning amps up the flavor. Bell peppers, onions, and tomatoes create a confetti of colors that swirl into the warm, orange-red color of the sauce created through the blending of heavy cream, chicken stock, paprika, and Cajun spices. You’ve gotta get a quality brand/blend of Cajun seasoning to make this dish perfect (I used McCormick and it was pretty good, but I saw some specialty brands at Fresh Market that looked even better), and the right one will make this dish fantastic.

Recipe: Baked Lobster Tails with Broccolini and Cheddar Cheese Polenta

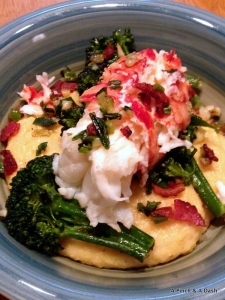
Lobster Tail with Polenta and Broccolini

Serves: 2-4

Prep. time: 10-20 minutes

Cooking time: Approx. 30 minutes

Difficulty: Easy to Moderate

Ingredients

For the lobster tails:

  • Salted butter
  • Paprika
  • Garlic powder
  • 2-4 lobster tails, cleaned
  • ½ – 1 package (2-4 servings) instant polenta
  • 1-2 bunches broccolini, stems cleaned and ends removed
  • 2 cloves garlic, minced
  • Chicken stock
  • 4-6 strips of bacon
  • Butter
  • Olive oil
  • 1-2 bunches green onion/scallions
  • Salt and pepper
  • Lemon juice
  • Paprika
  • Garlic powder
  • Sharp cheddar cheese (Cracker Barrel Vermont White Cheddar is lovely), shredded
  • Heavy cream/milk

Directions

Preheat the oven to 400*F. Steam or parboil the broccolini to get it a little tender, then set aside. Measure out the liquid for the polenta (I usually use all chicken stock or half chicken stock and half water instead of all water—chicken stock adds flavor) and pour into a large pot and start to heat it. Cook the bacon strips in a nonstick pan until crispy, then remove them to drain on paper towels and reserve a few tablespoons of the bacon fat. Cut a slit down the underside or back of the lobster tails to expose the meat (cut a chunk of shell out to expose more meat, if desired). Melt salted butter for the lobster tails, blend in the seasoning, and drizzle onto the meat of the lobster tails. Place the tails, uncut shell side down, on a piece of foil, wrap the foil around them, place them on a baking sheet, then place in the oven. Cook for 10-20 minutes, until the meat is white and tender. While the lobster is cooking, heat up the reserved bacon fat with a little butter and olive oil over medium heat, then add the green onion and broccolini and season with salt and pepper—cook until tender, then keep warm over low heat. Instant polenta generally takes 3-5 minutes to cook, so start to cook this when the lobster is just about finished. Pour the polenta into the boiling chicken stock (or water) and cook according to package instructions. When done, reduce the heat to medium-low, slowly stir in the shredded cheddar, add a splash of milk or heavy cream and a chunk of salted butter, and season (garlic powder, salt, and pepper) to taste. Keep warm over low heat, stirring occasionally to prevent it from sticking to the bottom of the pan. When the lobster is done, remove it from the oven and unwrap it. Carefully remove the flesh from the shell and plate it atop the creamy polenta and tender broccolini on a plate or in a large, wide bowl.

Cook’s Commentary

This is an easy to make meal that feels like a dish from a fancy downtown restaurant. Lobster has this sort of savory-sweetness that is much more delicate than the flavors of shrimp and other shell-fish, and cooking it in melted butter and seasoning lightly flavors it. Polenta is delicious on its own, but adding cheese to it brings it up to a whole different level and turns it into the ultimate comfort food. Broccolini is like slimmer, dainty broccoli and combined with the sharp, oniony taste of the scallions, it adds much-needed color and lightness to this dish. This dish is very easy and quick to make and will impress anyone from a significant other to a guest from out-of town.

Recipe: Pasta Bolognese

Servings: 2-4

Prep. time: 10-15 minutes

Cooking time: 20 minutes

Difficulty: Easy

Ingredients

  • 2 slices bacon
  • 1 carrot, finely chopped
  • 1 onion, finely chopped
  • 3 cloves garlic, minced
  • 3 strips prosciutto, cut into small pieces
  • 6-8 oz. lean ground beef*
  • Approx. 3 tbsp. tomato paste
  • White wine (cooking/dry)
  • Marsala wine (cooking/dry)
  • Chicken stock
  • Cinnamon
  • Paprika
  • Salt
  • Pepper
  • Butter
  • Olive oil
  • 8 oz. pasta**

*I prefer 90-93% lean.

**I used medium shells. Papadelle and other long, wide noodles are great with this sauce, but small pastas, like shells or orchiette, are great too.

Directions

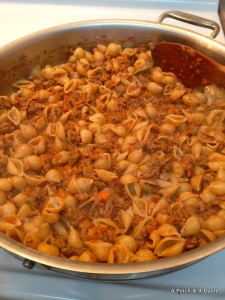
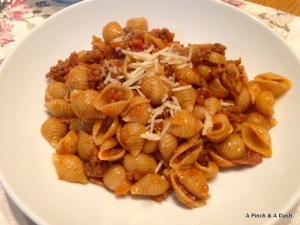
Heat a large, nonstick pan over medium-high heat, then add the bacon and cook until crispy. Remove the bacon to a plate covered in paper towels to drain. Add a little butter and olive oil to the bacon fat in the pan and add the onion and carrot, cooking until tender and fragrant, then add the prosciutto and continue to cook. Add the beef and cook, breaking the meat up as it cooks. Add a splash of marsala and splash of white wine and the garlic and continue to cook, letting the wine reduce and the beef continue to brown and cook. Crumble in the bacon strips and add the tomato paste, stirring to combine, then cook for approx. 3 minutes. Add the chicken stock, a little more of each wine, and reduce the heat to medium, stirring occasionally. Add in a pinch of cinnamon (a quick whiff of the sauce should let you know it’s there, but don’t add too much; 1-3 tsp. is probably enough) and paprika (1-3 tsp.), as well as some salt and pepper. Reduce the heat to low and continue to cook, covered. While the sauce is cooking over low heat, bring a medium pot of salted water to a boil and add the pasta. Cook for 6-8 minutes, or until al dente, then drain, and add the finished pasta in with the sauce, tossing to coat. The finished sauce should be a brownish-orange color, scented with cinnamon and paprika, and it should be somewhat thickened.

The sauce, as it's cooking

The sauce, as it’s cooking

Pasta Bolognese

Cook’s Commentary

There are many different ways to make a bolognese sauce—some recipes call for plum tomatoes while others call for just tomato paste, some use ground beef and veal while others use ground beef and pork, some suggest pairing it with long pasta noodles while others encourage the use of smaller pastas—I looked at many of these differing recipes and went my own way. Beef is the bulk of the meat in this dish, while the bacon and prosciutto add a little texture and saltiness to the sauce. Cinnamon and paprika add a heat and sweetness that balances the tanginess of the tomato paste and the salty-savory flavors of the meats. Chicken stock and wine create a sort of brothy sauce that soaks deliciously into the pasta noodles. It’s a hearty meal perfect for cold weather, and the sauce is delectable sopped up on a piece of bread at the end of the meal, and absolutely perfect paired with a red zinfandel or other sweet red wine.

Recipe: Romesco Sauce

Ingredients

  • 1, 1 inch thick slice of fresh, crusty bread, toasted and pulled into chunks
  • 1/2 cup whole, unsalted almonds
  • 1 large tomato
  • 4 to 5 garlic cloves, skins on*
  • 1 to 2 red bell peppers, halved, seeds and cores removed
  • 1 to 2 fresh cayenne peppers, stems removed**
  • Approx. 1/4 cup extra virgin olive oil
  • Splash of sherry or balsamic vinegar
  • 1 tbsp. smoked paprika
  • Salt and pepper
  • Garlic powder, if desired

*Cut of the little bit of root end from the cloves to make it easier to remove the skins later.

**Substitute with a pinch of crushed red pepper flakes if desired.

Directions

Preheat the oven to 375*F. Place the almonds on a smaller, ungreased baking sheet and roast for 3-6 minutes, until fragrant, then remove and set aside. Line a baking sheet with aluminum foil and spray with cooking spray (like Pam). Place garlic, tomato, bell pepper, and cayenne pepper on a baking sheet, drizzle with olive oil, and toss to coat. Roast for approx. 20 minutes, until the skins of the tomato and bell pepper blisters and everything is tender. Remove from oven, let cool slightly, then pull the skins off of the tomato, bell pepper, and garlic cloves and toss the skins. Add the roasted ingredients, bread, olive oil, vinegar, paprika, and salt and pepper to a food processor and blend until smooth. Serve as a dip, spread, or sauce. Sauce can be stored in an airtight container in the fridge for up to 5 days. Makes approx. 1.5-2 cups.

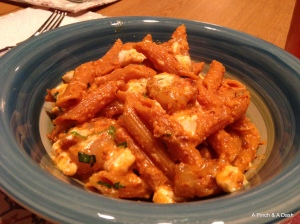
Pasta with Sauteed Shrimp, Mozzarella, Basil, and Romesco Sauce

Pasta with sauteed shrimp, mozzarella, basil, and romesco sauce

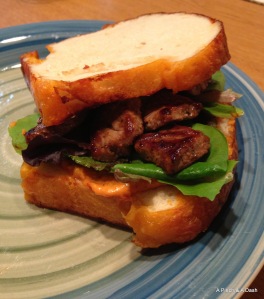
Steak sandwich with romesco sauce and arugula

Steak sandwich with romesco sauce and arugula

Cook’s Comments

I am in love with making all kinds of pesto—spinach and walnut, basil and pine nut, mint and pistachio—and this sauce is a lot like a creamy pesto. Roasted almonds give it a nutty flavor and slightly gritty (in a good way) texture. Bell peppers and cayenne peppers add heat, while sweet and tangy tomato help mellow the heat. This sauce is incredibly versatile—perfect with just about any meat, great tossed with pasta or slathered on a piece of crusty bread, and lovely as a sandwich spread. It’s easy to make, absolutely delicious, and one of my all time favorite sauces.

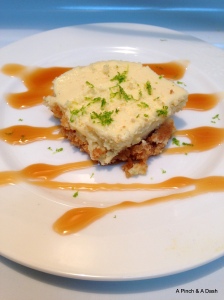
Recipe: Key Lime Bars

Ingredients

  • 1 cup and 3 tbsp. honey graham crackers, finely crushed
  • 1/3 cup granulated sugar
  • 5 tbsp. unsalted butter, melted
  • 3 large egg yolks*
  • 1&1/2 tsp. key lime (or reg. lime) zest
  • 1, 14 oz. can sweetened condensed milk
  • 2/3 cup key lime juice** (approx. 1 bag, or approx. 20-25 key limes)
  • Whipped cream or lime wedges for garnish, if desired

*If you’re worried about wasting egg whites, save them and try making meringues, souffle, omelets, or angel food cake.

**If you run a little short on key lime juice, use a little regular lime juice.


Directions

For the crust: Preheat oven to 350*F. Stir together crushed graham crackers, sugar, and melted butter in a small bowl until well-mixed (should look a bit like wet sand). Press evenly into the bottom of an 8-inch, oven-safe baking dish. Bake for approx. 10 minutes, until crust is golden brown and slightly dry, then let cool completely.

For the filling: Keep the oven at 350*F. Put the zest and egg yolks in the bowl of an electric mixer (fitted with a whisk) and mix on high speed until the mixture is thick, creamy, and pale yellow (approx. 4-6 minutes). Reduce speed to medium and slowly pour the condensed milk into the mixture in a steady stream. Raise the speed to high again and mix until thick (approx. 3-4 minutes). Reduce the speed to medium and slowly mix in the lime juice until just combined. Pour the mixture over the cooled crust and spread it evenly all over. Bake for approx. 10-12 minutes, until it is set (wiggles ever so slightly) and is just faintly golden around the edges. Let cool completely and then cover and chill in the fridge for a few hours. Serve with whipped cream, lime wedges, or a drizzle of chocolate or caramel. Eat within 3 days.

Adapted from Martha Stewart

Key Lime Bars

Cook’s Comments

I bought key limes on a whim the other week and, after noticing them languishing in my fridge a week later, I went on a frantic search for recipe ideas. Dessert bars are fast, easy, and delicious and the key limes worked perfectly in this application. These were a hit at work and at home—tangy, sweet, and creamy. Best in the summer time, but not bad on an unusually warm October day.